WARNING: This post has LOTS and LOTS and LOTS of pictures and is long winded... if you make it to the end CONGRATULATIONS! :-)
Hi there! I have an explaination for my long time absence. Well, many explainations.... first of all was birthday week. Second, has been my research, development, and partial implementation of cloth diapers... yes, I did say CLOTH Diapers. We will start however, with birthday week!
Birthday week started with me making two new dresses for our little miss! She got a special one for her actual birthday day and another special one for her birthday party day. Both days were very special for our big one year old! Here are some fun pics of birthday day:
It was a very good birthday day! :-)
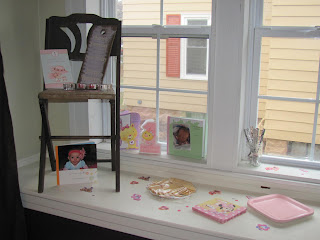
Annnd some of the birthday party day! I know... oh so many pictures... but I just love her cute little face! :-)
 |
| The cake... it was a Minnie theme birthday party because our Little Ladybug LOVES Mickey Mouse Clubhouse! |
 |
| I made the garland from tissue paper circles that I sewed together using my sewing machine! |
 |
| Birthday girl and her momma : ) |
 |
| She decided when it was time to open presents |
 |
| She did a really good job too! |
 |
| The wonderful fabulous Auntie Em and I helped get presents out of their packaging (don't you just looove my face : P ) |
 |
And then there was cake!
(We also had food... pulled bbq pork and chicken, along with chips and veggies...yum!) |
 |
| Mmmm cake! :-) |
 |
| I can't believe our beautiful Ladybug is 1... She is such a sweet 1 year old! :-) |
Now for the second half of this post it is on to cloth diapers. I know EWWWWWW... lets all say it together... EWWWWW!!!
Okay, now that that is out of our system let me tell you that I have discovered, as many have, that they really are not that bad! Like hardly any different at all from disposible diapers... don't believe me, I challenge you to try it yourself... :-P
After hours and hours and hours and hours of research on the internet, talking to friends, and talking to store owners who sell cloth diapers we came up with a system that works for us and also fit our budget as we did not want to invest $300 in diapers for a little girl who will hopfully be potty trained in a year and a half (I did say hopefully so don't laugh at me!).
Here is what we came up with... after much research and pbsession with cloth diapers we decided to buy a few prefolds and covers from a consignment store and try them out. We liked these at first. They seemed the cheap way to go and like they were pretty easy. Then the wiggling started...oh we have a wiggle monster on our hands! And she is just way to wiggly to get the prefold situated just so and then velcro a cover over her little booty so she won't leak. Soooo, we went with the next best thing. We chose to use fitteds with covers.
Now, for those of you not from cloth diaper land a fitted is just a step up from a prefold (the old fashioned white rectangle diapers) in that it is shaped like a disposible diaper and it snaps or velcros in the front so it is easy to put on a wiggler. Fitteds still need covers. The nice thing about the covers is that you can use them for a whole day as long as they don't get poo on them... yay! :-)
Now, I will admit that to buy fitted diapers from a store premade they can cost a pretty penny... BUT... you can make them for waaaaaay less!!! Can I get a YAAAHOOO?!?!?!
Many of my hours of research online was to find the perfect pattern for making fitted cloth diapers. I tried the
Rita's Rump Pocket diaper pattern, the
Ottobre Design diaper pattern, making my own pattern by tracing around a diaper we liked, and finally the
Goodness Gracious Diaper pattern. All of these patterns were free so I did not spend any money on them.
Rita's Rump Pocket seemed to work at first... but I think it runs a bit on the small side... maybe I printed it out wrong...lol! The ottobre diaper just looked funky to me (I didn't actually make any), and making my own pattern seemed to work at first... and I think if I had a serger to serge the edges instead of turning and top stitching it might have worked... but in reality those diapers aren't my favs either. Then I found the Goodness Gracious diaper pattern... and goodness gracious am I glad I did! ;-)
The goodness gracious diaper pattner requires you to print out two pieces of the pattern and tape them together. Then there is a booklet you can print out with allllllllll the directions on how to make the diapers if you need them! I used some of the directions and some of them I mde up as I went along. I love this pattern! I made the medium diaper and it fits our Little Ladybug perfectly with room to grow! :-) I am going to be making a lot more of these to up our stash... then when we have another little one (not for a long time!) I will make some newborn and small size diapers... so excited I found this pattern! :-)
If you want to know how and what I make my diapers out of let me know and I will write up a post about that.... in fact, I might just do that even if you don't want to know.... becuase I did a lot of research and just because I can :-P
For now though, here are some pics of my precious one year old (*tear*) sporting some of her new diapers!
 |
| First attempt diaper... with my own pattern |
 |
| Goodness Gracious pattern size Medium. With snaps added with my KamSnaps Snap pliers |
 |
| I think she likes it! |
Well, if you made it to the end... good job! And thanks for visiting! :-)
Linking here:


